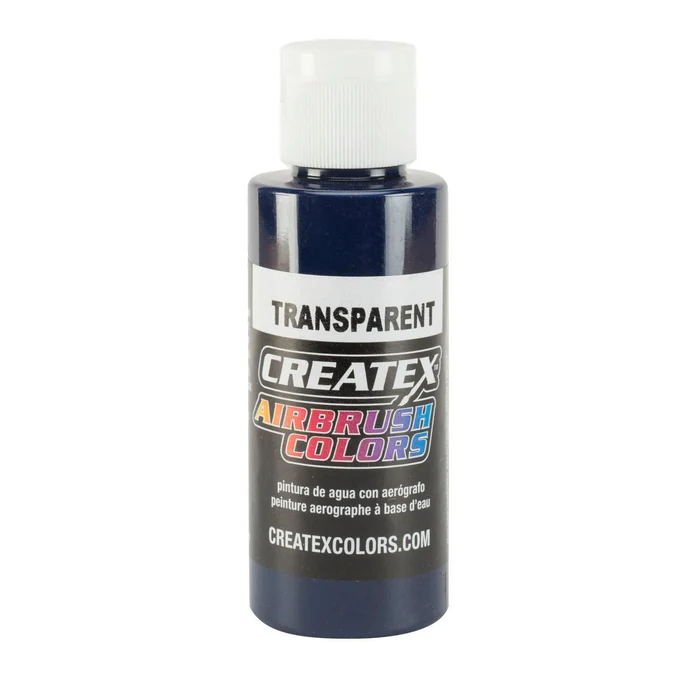
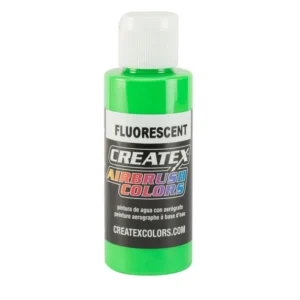
Createx Transparent Deep Blue 5108 60ml

The Createx Classic Transparent range is made up of water-based acrylic paints that offer exceptional transparency. These paints are ideal for achieving layering, shading, and gradient effects on various surfaces.

SKU: 115108 Categories: ,

8,00 

1 in stock

Full description

The Createx Classic Transparent range is made up of water -based acrylic paintings that offer exceptional transparency. These paintings are ideal for obtaining the effects of superposition, shade and gradient on various supports.

Here are some characteristics of the Createx Classic Transparent range:

  1. Transparency: As their name suggests, these paintings are transparent. This means that they allow light to go through, revealing the color layers or the underlying material.
  2. Vibrant colors: Despite their transparency, these paintings offer rich and luminous colors. They are available in a variety of colors to meet all your artistic needs.
  3. Versatile use: They are perfect for a variety of applications, including the art of airbrush, canvas painting, glass work and other supports.
  4. Dilution: They can be diluted with water or a specific reducer to adjust the transparency and the fluidity of the paint.
  5. Sustainability : Once dry, these paintings are resistant to water and durable, which makes them ideal for use on works of art which will be exposed to variable environmental conditions.
  6. Security : Since they are water -based, these paintings are less toxic and safer to use than their solvent -based counterparts.

So, whether you are a professional artist or an amateur, the Createx Classic transparent paintings can help you add depth and dimension to your artistic creations.


Painting advice

Painting a RC car body (radio controlled) can be a fun and creative process. Here is a series of general steps to paint a RC body using Createx paintings and an airbrush:

  1. Body preparation: The first step is to clean the body of your RC car well. You can use warm soapy water for this. Make sure to remove all dirt and oils that could prevent painting from adhering well. Let the body dry completely before continuing.
  2. Masking: If you plan to use several colors or if you have a specific design in mind, you will have to hide certain parts of the body. Use masking tape specially designed for this, and take your time to ensure clear and precise lines.
  3. Preparation of painting: Createx paintings must be well agitated before use. For the airbrush, you may need to dilute your painting. The consistency must be similar to that of a skimmed milk. If necessary, add a few drops of water or specific diluent for airbrush.
  4. Apply the painting: With your airbrush, start applying the paint with thin and uniform layers. Start by the edge and work towards the center. It is best to paint in several thin layers rather than a single thick layer to avoid drips. Let each layer dry before applying the next.
  5. Detail : Once your basic color is dry, you can add details or other colors if you wish. Make sure each layer is completely dry before continuing.
  6. Finishes: After letting your last layer of paint dry completely, you can gently remove the masking tape. For a brilliant and durable finish, consider applying a transparent varnish specially designed for airbrush painting.
  7. Cleaning: Do not forget to clean your airbrush after each use to keep it in good working order.

Remember that painting with an airbrush is a skill that improves with practice. So take your time and have fun with the process. Good painting!


Createx application tips

The use of Createx Classic transparent paintings requires a certain technique to make the most of their transparency and their ability to create depth and dimension. Here are some tips:

  1. Support preparation: Make sure the support you work is clean and dry. Transparent paintings allow you to see the underlying surface, so it is important that it is properly prepared.
  2. Dilution: Createx classic transparent paintings can be diluted using water or a specific reducer like Createx 4012 High Performance Reduce to adjust their fluidity. Start with a report of 1: 1 (paint: reducer) and adjust according to your preferences.
  3. Application : You can apply these paintings with an airbrush, a brush or any other paint tool. To obtain maximum transparency, apply thin layers and let each layer dry before applying the next.
  4. Superposition: One of the great forces of transparent paintings is their ability to be superimposed. This technique makes it possible to create depth and gradients of colors by superimposing different layers of paint.
  5. Drying: Let the paint dry completely before handling the work or apply a finish. The drying time can vary depending on the thickness of the paint and environmental conditions.
  6. Cleaning: Clean your tools immediately after use to prevent paint from drying and blocking them.

Remember that the practice makes the master! Do not hesitate to experiment with these paintings to discover all the possibilities they offer.


Specifications

Painting type: acrylic


Dilution advice

The use of Createx Classic transparent paintings requires a certain technique to make the most of their transparency and their ability to create depth and dimension. Here are some tips:

  1. Support preparation: Make sure the support you work is clean and dry. Transparent paintings allow you to see the underlying surface, so it is important that it is properly prepared.
  2. Dilution: Createx classic transparent paintings can be diluted using water or a specific reducer like Createx 4012 High Performance Reduce to adjust their fluidity. Start with a report of 1: 1 (paint: reducer) and adjust according to your preferences.
  3. Application : You can apply these paintings with an airbrush, a brush or any other paint tool. To obtain maximum transparency, apply thin layers and let each layer dry before applying the next.
  4. Superposition: One of the great forces of transparent paintings is their ability to be superimposed. This technique makes it possible to create depth and gradients of colors by superimposing different layers of paint.
  5. Drying: Let the paint dry completely before handling the work or apply a finish. The drying time can vary depending on the thickness of the paint and environmental conditions.
  6. Cleaning: Clean your tools immediately after use to prevent paint from drying and blocking them.

Remember that the practice makes the master! Do not hesitate to experiment with these paintings to discover all the possibilities they offer.

Reviews

Only logged in customers who have purchased this product may leave a review.